Tuesday, October 29, 2013

Quick and Easy Halloween School Treat

This isn't sewing-related, but you have probably figured out by now, especially if you follow me on Facebook or Instagram, that I love to bake, too.  Last year, I made some awesome pretzel and white chocolate spider web treats for my son's pre-k class.  I planned to make the same this year for kindergarten.  But then I realized that he has 150% more kids in his class this year (25!!).  And the spider webs take quite awhile to get just right.  Not to mention that we walk to school every day, and I am afraid of what would happen to them if they got ostled around.  So I simplified the treat into spiders.

Eight legs.
White chocolate chips melted to make a dollop in the middle for the body.
Two raisin eyes.
Done!
And easy enough for my kindergartener to help with.  We love the combination of the salty pretzels and sweet white chocolate.  Just enough for a treat, but not so much sugar that the kids go batty!


Saturday, September 21, 2013

Simple Cork Board Makeover

With school in full swing, my refrigerator is getting cluttered up with drawings and spelling tests.  And they always fly off when the dog passes by with his big tail wagging.  I seem to have found my crafty mojo again (finally!!), so we did a quick project today to help the kids organize their own favorite pieces of school work (and get them out of the kitchen).

We bought simple cork bulletin boards at Ikea.


Everything else came from my stash.  I let the kids choose a fabric.  Good thing, too, because they both chose something that I wouldn't have expected them to like.  I cut each fabric into a rectangle about an inch and a half wider on each side than the framed bulletin board.  I didn't worry about exact measurements.


Then I went through my glue selection and found this!  I sprayed each board very well with glue, centered the fabric over it, and then just smoothed it on.  Then I turned the boards around, sprayed the frame edges, and wrapped the fabric toward the back.


Voila!  They came out better than I expected for the little time they took.


I always go to fabric first when trying to pretty something up.  And this time it didn't even involve the sewing machine.  I love easy projects!

Thursday, September 19, 2013

Some sewing for you, some sewing for me

We are in a new school district this year, and the schedule has really thrown us for a loop.  Now that I have one in kindergarten and one in second grade, everyone asks me what I do all day while they're in school.  Th answer: I run around like a crazy person.  My little guy in K gets out of school earlier than my daughter in 2nd.  Every day of the week.  Three days a week, he comes home shortly after lunch.  The other two days, he gets out a bit later, but still an hour earlier than the upper grades.  So I walk to and from school three times per day.  Make that 4 if it's Monday, because that's my day to volunteer in kindergarten.  After a month of school, I'm still trying to figure out how to fit in working out and household chores.  Sewing is squeezed in here and there, but not nearly as much as I would like!

I came up with a grand idea a couple of weeks ago to focus the business aspect of my sewing a bit more, and concentrate on one of my favorite things to make: wallets.  I'd like to eventually have everything streamlined down to two collections, one featuring fun prints (The Whimsy Collection) and one with a bit more versatile solids and just a pop of color on the inside (The Classic Collection).  The idea was to whip up samples of three or four wallet styles in each collection, and launch them all at once in my shop.  But with my current schedule, that could take months!  Still keeping the same general game plan in mind, I'm going to give you a sneak peek of the first in the Whimsy Collection right here.  These are the largest wallets I will be making, from 
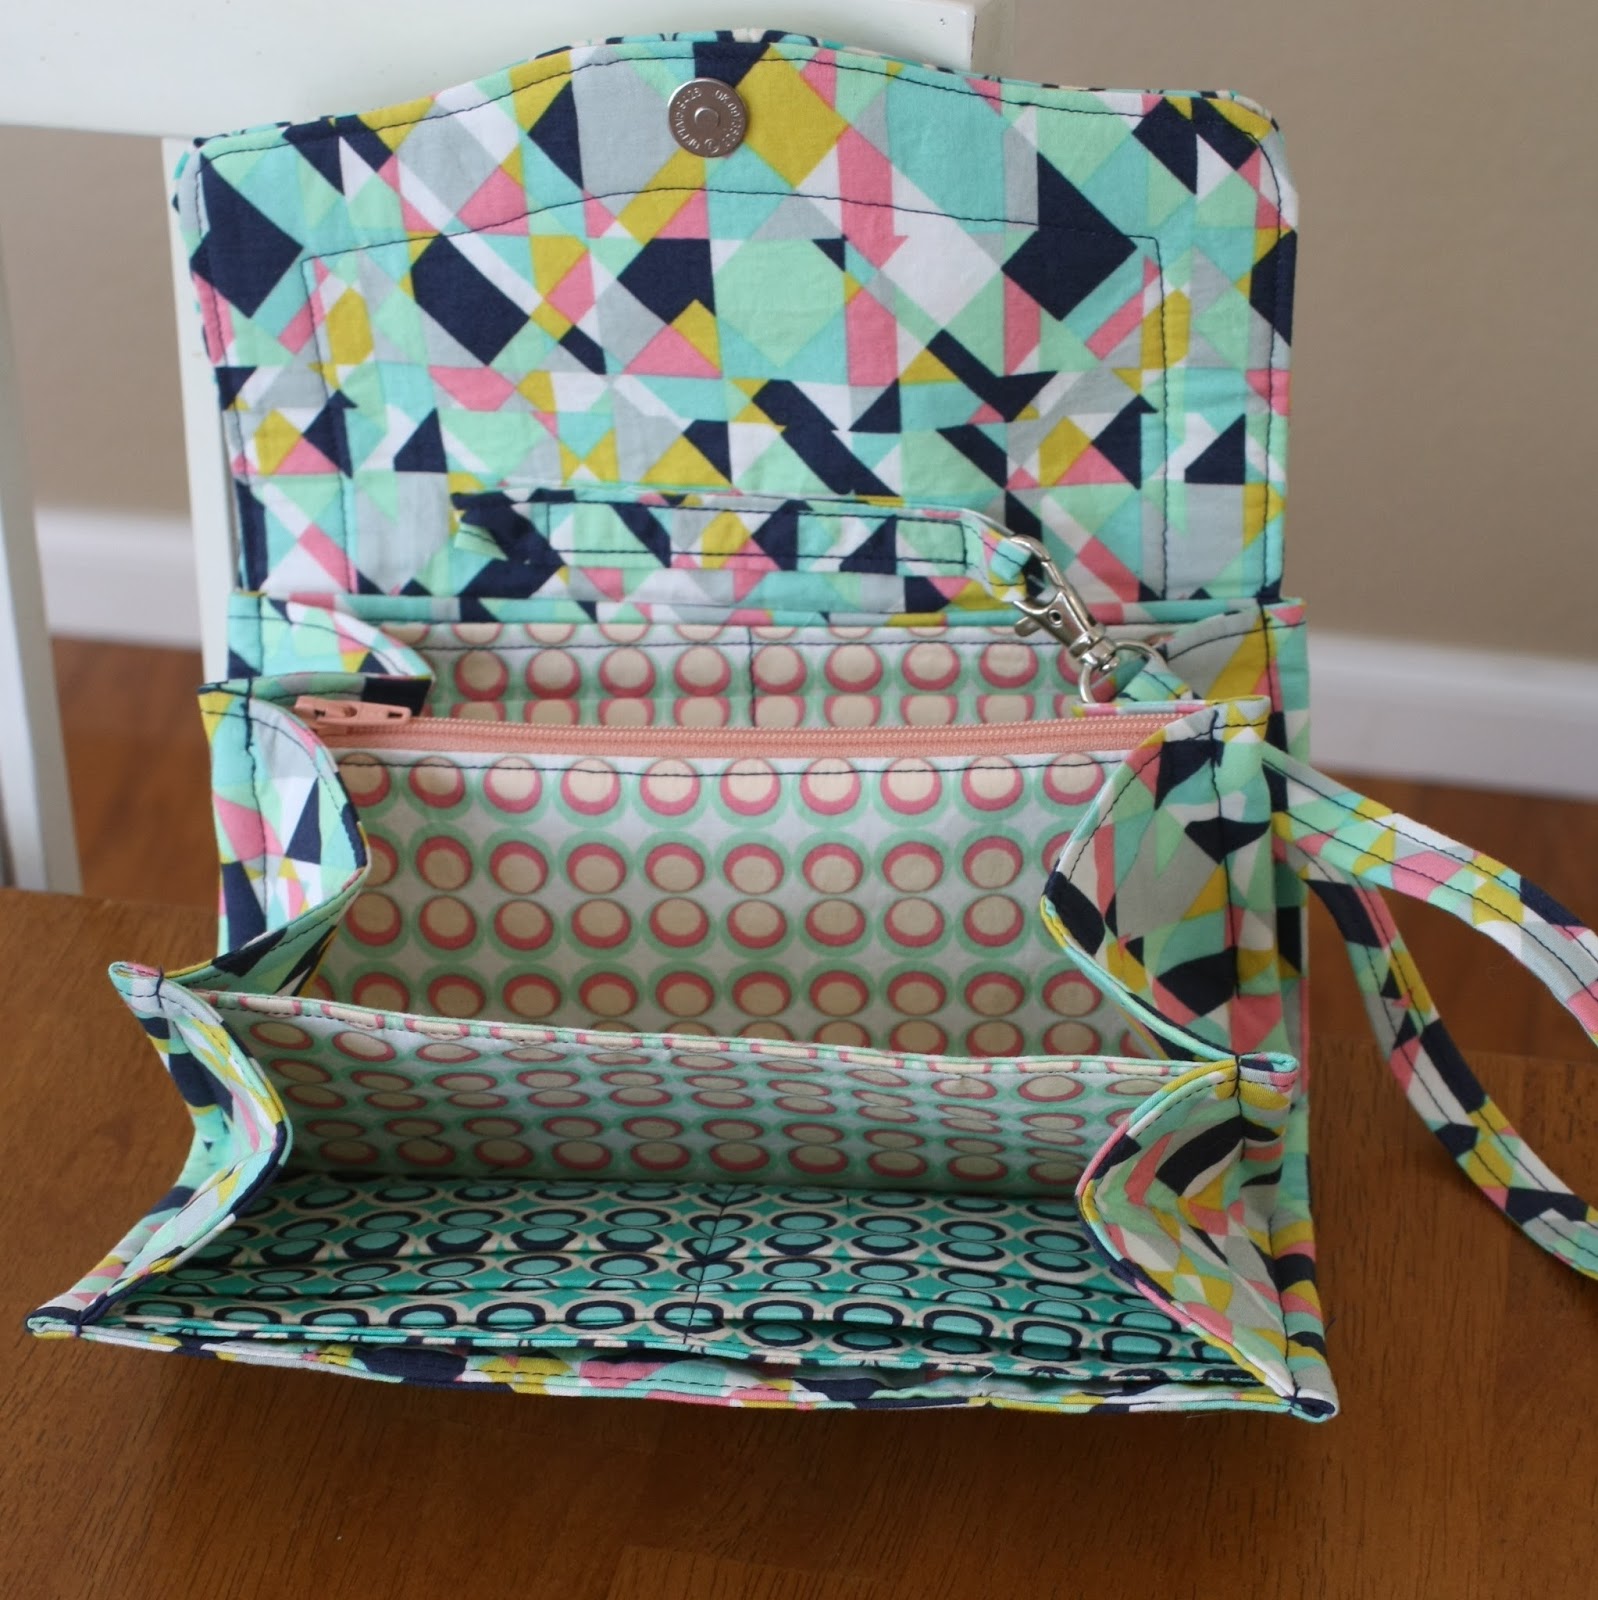
a pattern by Emmaline Bags.  For me, this is the ultimate wallet for organizing everything in one place.  It has 12 card slots, an inside zip pocket for change, two slip pockets for checkbook/cash/receipts, and extra spots inside where you can even stash your phone.  I added a wrist strap and could make a long cross-body strap as well.  Here are some quick snaps to give you an idea of the style:


 I'm still working out the pricing on these, factoring in materials and the time it takes to make them, as they are very detailed.  Next on my list is to make up some in solid canvas and linen.

Now to the sewing for ME part!  Have you heard about Selfish Sewing Week?  It's next week, and the perfect reason for me to put aside my other projects and focus on several that have been on the back burner for myself.


I went to Jo-Ann's today after realizing that I may need to tone down my fabric choices a bit from those in my stash if I am going to make something that I will actually wear. I had planned to use these: a beautiful (but large-scale) print voile and a minty striped knit.


My plan is to finally make myself a Washi Dress, and also try out this knit skirt from icandy handmade.
I got a more subdued gray and gold geometric print for the dress, and some brown knit for the skirt that I plan to add an applique to.  I also found a lawn on the sale rack that may end up as a tunic version of the Washi Dress.  If I have time.  Ha.


Now to get everything cut out this weekend so that next week, all I have to do is sew, sew, sew.

Tuesday, August 6, 2013

New home, new project


When the Tsuru line by Rashida Coleman-Hale came out, I stashed a half-yard bundle with our new home in mind. As a military family that usually rents homes when we move, we are always happy to find walls that are painted any color other than white.  But our new living room, with 15-foot high tan walls and beige carpeting, needed some color.  Badly. I finally plugged in my sewing machine for the first time since May and got to work!

Before...
Knowing that two kids and a dog are going to use these pillow covers, I designed them to be easily removable and washable.  And since the beautiful fabric is organic cotton from Cloud 9, I quilted it onto some Pellon Thermolam to make it a bit sturdier for everyday use.  We have a habit of using our living room pillows as lap desks for computers, iPads, and maybe, um, ice cream bowls.  The quilting also makes the pillows feel extra cozy.

Zippers from my stash makes them easy to remove

Simple, straight-line quilting
I pieced each pillow for a little pop of contrast on the front, and used a coordinating print on the back, making them reversible, too.


 It's amazing what a little color can do to make a place feel like home.


And the kids are making a game out of rearranging the pillows every time I leave the room.


Next up: repainting that coffee table so it doesn't blend into the floor...

Tuesday, May 28, 2013

The roly-poly-along blog tour and giveaway


For the longest time, I was intimidated by sewing clothing.  I was making tons of bags, wallets, iPad cases, etc., but the thought of making something that actually had to fit someone and look good was scary.  Along came Rachael from imagine gnats, who is constantly posting cute pics of things she makes for her girls to wear.  When she asked me to test out her roly-poly pinafore pattern, it was the final push I needed to give garment sewing a go.  And now I seem to be slightly addicted!  Oops!

Really, though, if you have never sewn a garment, this is a great pattern to start out with.  It's cute, simple, functional, and can be made your own in a thousand different ways.  Have you stopped by the other blog tour spots?  There are some really amazing designs!  I chose to go a little more simple and focus on my sewing technique, but I did split the front into two different fabrics to give it a color-blocked look.  I made it fully reversible, with buttons on both sides.  My girlie loved the pockets on the original test version that I sewed up, but I hit a mind block when trying to figure out how to do pockets accessible from both sides of the reversible look.  After I decided to omit them altogether, I realized that I just needed two sets of pockets, one on each side.  Oh well--there's always next time.  Because there will be many next times with this one.

  
  The reverse side


I took the time to really work on my pleats and
topstitching,
 especially since I used contrasting thread!


One happy roly-poly girlie!
How about a copy of the pattern for yourself?  Just comment on this post and be entered to win one!  You can earn an extra entry by liking my Facebook page and commenting that you did.  Be sure I can reach you via email.  Giveaway will close May 31 at 5pm AK time.
You can also purchase the pattern right now on Etsy here.

Be sure to visit the rest of the stops on the the tour!


5.13 Jill Made with Moxie / Stephanie The Crafty Kitty
5.14 Stephanie NeurosesGalore / Cherie you & mie
5.15 Ari Max California / Caila Caila Made
5.16 Veronica SewVery / Tara Girl like the sea
5.17 Nancy owen's olivia / Adrianna Crafterhours

5.20 Ajaire Call ajaire / Sarah EmmylouBeeDoo
5.21 Laura Craftstorming / Jessica a little gray
5.22 Frances Miss Matatabi / Nicke kiss kiss quilt
5.23 Amy formwork design / Kat Sew Chibi
5.24 Joanne Rose & Dahlia / Amanda Kitschy Coo

5.27 Celina Petit a Petit and family / Delia Delia Creates
5.28 Christy a.Amelia handmade / Carolyn Fake It While You Make It
5.29 Bonnie Fishsticks Designs / Maria La Inglesita
5.30 Jane Buzzmills / Kate Things for Charlie
5.31 Polly Jack & GeeGee / Molly Rose & Odin


Thursday, May 16, 2013

Pattern Testing and Blog Touring

Ever since Rachael got me started on pattern testing and sewing kids clothing at the same time, I have been on a roll with both.  My kids are loving my newfound skills, and I love testing patterns because I always learn something new.

The tumble tee pattern test was no exception.  Here's a little sneak peek at the dress version of the pattern, coming soon from imagine gnats.  Her included tips on finishing seams in knits made me pull out my sewing machine manual and learn the overlock stitch, which is pretty darn close to a serger stitch.  Who knew?!  It's pretty obvious that my girlie loves the dress.


Thanks to the afore-mentioned first pattern that I tested for Rachael, the roly-poly pinafore, I'm a stop on the roly-poly-along blog tour that is going on right now!  Stop by on May 28 to see a new version of the roly-poly that I made, and check out the other stops on the tour for lots of fun ideas. I'll even have a copy of the pattern to give away!


Wednesday, May 15, 2013

Indie Quilt: Finished!

Finally.  After much procrastination, it's done.

I put off the backing and binding for weeks.  It's my least-favorite part of making a large quilt. It's just so hard to get the fabric completely smooth.  At least the front was already quilted, so I knew that part would look wrinkle-free.  I don't recommend the use of quilt basting spray.  Yikes.  What a mess.  Just ask my poor husband, who really tried to help me with that part.  By the end, our socks were sticking to the floor, and the quilt was crooked and creased.  But we emerged victorious!

This came out exactly as I envisioned it, which nearly never happens to me.  I kinda made it up as I went, with the intent of having large enough pieces of the prints to be able to fully appreciate them.  I just love this fabric! (Indie by Pat Bravo, in case you missed that part.)  I sewed up the strips first, and then quilted as I sewed them together into rows.  The top corner has a blank navy rectangle, which adds  a fun bit of asymmetry.


I detest hand-sewing binding, so I wrapped the edges of the backing around to the front and machine stitched the whole thing.


The backing is a couple of large pieces of my favorite prints from the front.